I love ice cream sandwiches, and making your own is so fun. These chocolate cherry ice cream sandwiches? Divine! Some links in this post are affiliate links that earn me a commission if you shop through them.

So you may not know that it’s National Ice Cream Month right now. If you didn’t know before, you’re welcome. Or I’m sorry. Whichever.
This might explain why I’ve been on a bit of an ice cream kick lately. I’ve made peach ice cream, cherry chip ice cream, salted caramel Nestle Crunch ice cream (twice), and now a cherry kefir based ice cream.
Good thing I’ve been going to the gym, right?
I tend to love fruit based ice creams. And coffee. Then there’s rum raisin. Possibly caramel. But mostly fruit.
Making it at home makes such a difference. The lack of additives in homemade ice cream means it tastes so much better, which is good because it means I only eat ice cream when I make it now.
Looking for more fun ice cream recipes? Check out my favorites at the end of this article.
For this ice cream, I wanted it to have a little tang, which meant that of course I was going to use some of my remaining plain Kefir from the cucumber salad and lemon kefir marinated chicken that I made last week.
It was perfect in place of whole milk, and because I wasn’t making a custard base for this yogurt, the probiotic cultures stayed alive, too – see, healthy ice cream. Sorta.

The ice cream came together amazingly fast once I macerated some cherries. I wanted the cherries to soften up and release their juices to make the cherries easier to eat in the ice cream and to ensure the entire ice cream base had a lovely cherry flavor to it.
Once I pitted and sliced my cherries, I just let them sit for a half hour, and it’s amazing to see the difference in the cherries in such a short time.
After I let the ice cream set up – which I did overnight because this ice cream will never get rock hard, and I wanted it to be really firm for my sandwiches – my husband started pestering me to find out when he could eat it.
Fortunately, the cookies bake fairly quickly, and once they cooled (I don’t want to melt the ice cream!), I gave in and scooped up a lovely bit of ice cream and made a sandwich for him. And me.

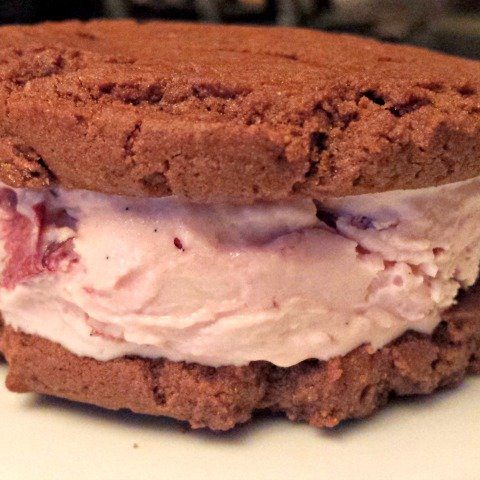
They were heavenly. The cookies were mildly spicy and chewy and soft and complemented the cherry ice cream perfectly. The vanilla added just the right depth of flavor without being bitter whatsoever.
And my husband texted me the next day to say that when he showed coworkers the photos of the dessert, they all wanted to marry me. He’s a schoolteacher. I always wanted sister wives, didn’t you?
How to Make Chocolate Cherry Ice Cream Sandwiches
Make the cherry ice cream
Wash your cherries and dry them well. Pit the cherries, and cut them into four pieces.
Place the pieces into a large bowl. Once you have all your cherries pitted and sliced, add the sugar to your cherries and stir once just to ensure each of the cherries is in contact with sugar.
It will look like a lot of sugar, but this is all you will be using to make almost a half gallon of ice cream. Let your cherries rest for a half hour to release their juices.

Once your cherries have macerated, add the cream and kefir to your bowl and stir. Add the vanilla and salt to your mixture and stir again with a spatula to ensure it is all incorporated.

Pour into a prepared ice cream maker and follow the instructions to process it. The ice cream will increase significantly in volume as air is incorporated during processing.
Once it is complete, pour it into a container for the freezer. Have you seen the fantastic ice cream containers that make scooping so easy? LOVE!
Freeze for at least six hours and preferably overnight. This ice cream will never be rock hard and takes awhile to become consistently frozen throughout, but the wait is worth it for ice cream you don’t have to soften before eating each time.

Make the cookies
For the cookies, preheat your oven to 350 degrees. Line two cookie sheets with parchment paper or a silpat. Again, have you found the awesome already cut for your cookie sheet sized parchment paper? Why didn’t I invent that?
Add your softened butter, sugar and brown sugar to a bowl and beat until lightened in color and texture. Add the egg, vanilla, and salt. Beat again until thoroughly incorporated. Scrape your bowl as needed to ensure everything gets mixed together.
Turn off the mixer, and add the cocoa powder, baking soda, and cinnamon. Turn the mixer on low to incorporate; otherwise, your cocoa powder will come flying out.
Once it is mixed, turn the mixer up to ensure it’s well beaten, again scraping down the bowl as needed. Add the flour and stir on low just until the flour is incorporated.
Using a large cookie scoop, scoop your cookies onto your prepared baking sheet. This will make 12 cookies, with six cookies per baking sheet.

Get a glass with a flat bottom and dip into some extra granulated sugar. Gently press the bottom of the glass onto your cookies to flatten them until they are about a half inch thick.
Dip again into the sugar as needed to keep the glass from sticking to your cookies.

Bake at 350 degrees for 10-12 minutes, until the tops have cracked. Let cool thoroughly before moving or using for your ice cream sandwiches.
Assembling your ice cream sandwiches
Once your cookies have completely cooled, get a generous scoop of ice cream. Place it onto your baking sheet away from the cookies.
Using the back of the ice cream scoop, gently press down onto your ice cream to flatten it just a bit so that it will sit nicely onto your cookie. Pick the ice cream back up and set it on one upside down cookie and set a second cookie right side up on top of that. Press down gently, and serve immediately.
If you are not eating these immediately, prepare one cookie at a time. As soon as you have it complete, wrap it as tightly as possible in two layers of plastic wrap and place it immediately in the freezer before starting on your next cookie.
These chocolate cherry ice cream sandwiches will stay in your freezer for up to a month, but no way will they really last that long.
Have you ever made homemade ice cream sandwiches?
Enjoy more of my favorite ice cream recipes:
- Salted caramel ice cream
- Cherry chip ice cream
- Cookie dough frozen custard
- Avocado ice cream (don’t knock it until you’ve tried it!)
- Dole Whip homemade pineapple ice cream
- Bailey’s Irish cream ice cream
- Bourbon peach ice cream

Chocolate Cherry Ice Cream Sandwiches
The most decadent ice cream sandwich you'll ever eat. Chewy chocolate cookies with a hint of spice are paired with a slightly tart and sour cherry ice cream for heaven in your mouth - all from a surprisingly easy recipe!
Ingredients
Ice Cream Ingredients
- 2/3 c sugar
- 2 c cherries, pitted and sliced
- 2 c heavy whipping cream
- 2 c plain kefir
- 2 t vanilla
- 1/4 t salt
Chewy Chocolate Cookie Ingredients
- 1/2 c butter, unsalted, at room temperature
- 1/2 c sugar
- 1/2 c brown sugar
- 1 egg
- 1 t vanilla
- 1/3 c cocoa powder
- 1/2 t baking soda
- 1/4 t cinnamon
- 1 1/4 c flour
Instructions
- Wash and dry cherries. Pit the cherries, and cut into four pieces. Place pieces into a large bowl. Add sugar to cherries and stir. Let cherries rest for a half hour.
- Add vanilla, salt, cream and kefir to bowl and stir.
- Pour into prepared ice cream maker and follow instructions to process. Pour into container and freeze for at least 6 hours and preferably overnight. This ice cream will never be rock hard and takes awhile to become consistently frozen throughout, but the wait is worth it for ice cream you don't have to soften before eating each time.
- For cookies, preheat oven to 350 degrees. Line two cookie sheets with parchment paper or a silpat.
- Add softened butter, sugar and brown sugar to a bowl and beat until lightened in color and texture. Add egg, vanilla, and salt. Beat again until thoroughly incorporated. Scrape bowl as needed.
- Add cocoa powder, baking soda, and cinnamon and mix on low to incorporate. Once mixed, turn the mixer up and beat well. Add flour and stir on low just until incorporated.
- Using a large cookie scoop, scoop cookies onto prepared baking sheet, 6 cookies per sheet. Dip a glass into extra granulated sugar. Gently press bottom of the glass onto cookies to flatten to 1/2 inch thick.
- Bake at 350 degrees for 10-12 minutes, until tops crack. Let cool thoroughly before moving or using for your ice cream sandwiches.
- Place a generous scoop of ice cream on baking sheet away from cookies. Using the back of the cookie scoop, gently press down to flatten to sit nicely onto the cookie. Place ice cream on one upside down cookie and set a second cookie right side up on top. Press down gently, and serve immediately.
Notes
- This ice cream never gets rock hard, so you do not need to soften before scooping. If you don't have (or like) plain kefir, substitute with whole milk instead.
- If you are not eating these immediately, prepare one cookie at a time. As soon as you have it complete, wrap it as tightly as possible in two layers of plastic wrap and place it immediately in the freezer before starting on your next cookie. They will stay in your freezer for up to a month, but no way will they really last that long.
Recommended Products
As an Amazon Associate and member of other affiliate programs, I earn a commission from qualifying purchases.


Nutrition Information:
Yield: 6 Serving Size: 1 sandwichAmount Per Serving: Calories: 813Total Fat: 46gSaturated Fat: 29gTrans Fat: 1gUnsaturated Fat: 14gCholesterol: 165mgSodium: 400mgCarbohydrates: 90gFiber: 3gSugar: 66gProtein: 11g
This site uses an outside source to provide nutrition. If you need exact details, please calculate yourself.
 I am a participant in the Amazon Services LLC Associates Program, an affiliate advertising program designed to provide a means for sites to earn advertising fees by advertising and linking to Amazon.com.
Wow, I have never thought about making my own ice cream sandwiches! It looks fairly easy. Thanks for sharing your recipe!
As soon as I saw this in the link-up I knew it was yours. Yum. Amazingly yum. 🙂
Can you move next door to me, please?
This looks heavenly. I have a friend who makes her own kefir and swears by it, although I have never tried it. It sounds and looks yum!! Thanks for sharing!