
Yesterday was my mom’s 70th birthday. I can’t believe she’s 70 – and neither can she. My family and I spent the day at her house celebrating with her. We played games, ordered (way too much) Chinese food, and of course had birthday cake with candles.

Here’s the rub. We almost had no birthday cake. Why? My mom doesn’t really like food, so she started out saying that she didn’t want a birthday cake. Then she decided we could just pull out a leftover partial cheesecake my dad had bought her for Mother’s Day. Or we could just pick up something somewhere. I refused at each turn – a birthday is meant to be celebrated with a cake made just for you and made the way you want it. Finally, she admitted that she really wanted a lemon cake, but she didn’t want anyone to go through any trouble for it. That is my mom to a T.
So of course I told her I’d make her one. Lemon? Why not. I’m sure she was thinking more of like a cake flavored with lemon, but I wanted to do something light and airy that had a lemon filling instead. Any lemon flavoring I was thinking of for the cake itself would end up with a dense, heavy cake – not something I want for July 1.
I’m pretty proud of what I came up with – and I made it all dairy free so Little Miss could have some, as well. This lemon curd filling is dense enough that it didn’t ooze out of the cake but still tender and light and mildly decadent. It was a beautiful compliment to the light vanilla layer cake I made and the sweet tooth fluffy frosting I used to top the cake.
The nice thing is that the lemon filling can easily be made a day or two ahead of time, which means that when prepping for a party, you can have less to do and stress about the day of. The only downside to this is that some people may discover your lemon curd and think that it’s so good on its own that you end up with just a tiny bit less than you were anticipating.

Fortunately, I stopped her before she ate much of it, and this recipe easily fills a four layer cake so no one but me noticed that it was a little short.

Lemon Curd Filling
Ingredients:
1 1/2 c sugar
2 lemons, zested
1 c lemon juice
1/4 t salt
4 eggs
6 egg yolks*
1 t unflavored gelatin
1/2 c butter, frozen
*Save your whites to make your cake to go with this lemon curd filling.
Directions:
Add the sugar to a heavy nonreactive saucepan (acids don’t like copper and other reactive metals). Zest the lemons directly into the pot and set the lemons aside.

Before you start cooking, you want to extract as much of the lemon oil in the zest as possible and integrate it into your sugar to give a maximum fresh lemon taste. Using your (clean) fingers, squish around the sugar and lemon zest until the sugar starts to feel a little moist from the oils.

Add your lemon juice, salt, and gelatin to the sugar mixture and bring the heat to medium high, stirring periodically to dissolve your sugar. Don’t let it boil.
While the sugar is heating and dissolving, separate six eggs to get your egg yolks, saving the egg whites for your cake. Whisk together the egg yolks and the remaining four eggs in a larger bowl than you think you’ll need.
As soon as the sugar is dissolved, remove the pot from the stove. While whisking the eggs, slowly pour the hot liquid into the eggs to temper them. If you don’t whisk or if you pour too quickly, you’ll end up with scrambled eggs. Once the mixture is fully incorporated, pour back into your saucepan and return it to the stove.
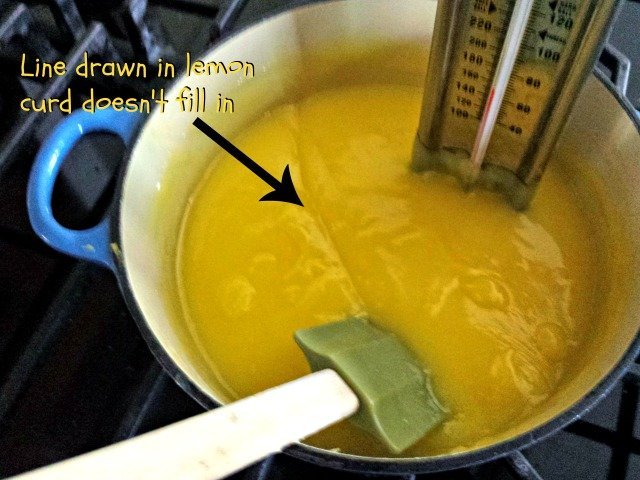
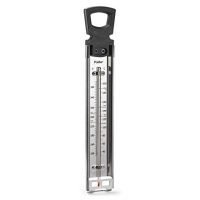
Cook at medium low heat for 10 or so minutes, stirring constantly with a whisk to keep anything from burning on the bottom. If you have a candy thermometer, keep cooking until it reaches 170 degrees. If you don’t have a thermometer, you’ll know it’s done when it starts to get really thick and darkens in color. When you can draw a line in your lemon curd with a spatula and the line remains after you’ve drawn it, you know it’s done.
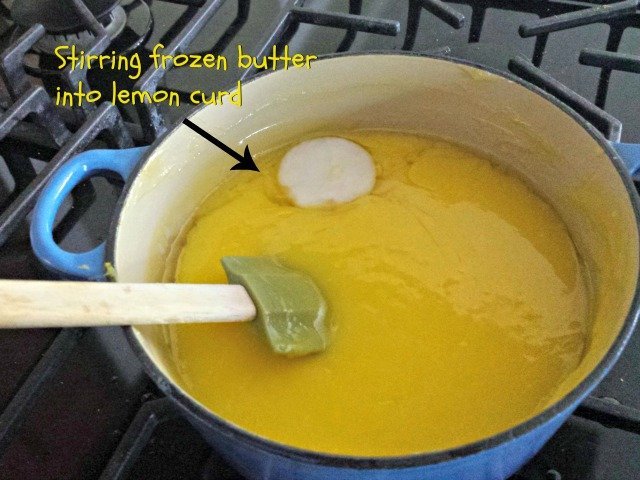
Turn the heat off, and add the frozen butter. This fat is what adds a last decadence to your lemon curd, so don’t skip the step. It also helps to cool it so that you can put it in your fridge sooner. Once you add the butter, keep stirring constantly so that the fat is absorbed into your lemon curd. If you stir too quickly, it will splash out, so be aware.
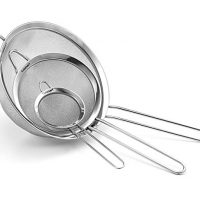
Once the butter is fully incorporated, you need to strain your lemon curd. Generally, I don’t strain the foods I make, as I like to have the texture in there. In this case, I want my lemon curd on my cake to be as smooth as possible, so this is the one time I will actually strain out the skin or seeds in a recipe. Use a fine mesh strainer and carefully pour your lemon curd into the strainer over a heat safe storage container. Once it’s in the strainer, use a spatula against the edges of the strainer to push out all the lemon curd until you have only the lemon zest remaining. Sadly, discard the lemon zest (or feed it to a child who thinks it tastes amazing).

Place plastic wrap atop it so that your lemon curd doesn’t develop a skin. Store it in the refrigerator until you’re ready to use it. This will easily keep two to three days and still make a beautiful filling for a cake. Simply stir it up and use when you’re ready!
I made my recipe dairy free by utilizing coconut oil in place of the butter. It worked beautifully and didn’t change the flavor. If you have allergies, this is a great substitute.


Lemon Curd Filling
Easy recipe for homemade lemon curd - a perfect filling for cakes and pies. This pairs beautifully with this light and airy vanilla cake and fluffy frosting.
Ingredients
- 1 1/2 c sugar
- 2 lemons, zested
- 1 c lemon juice
- 1/4 t salt
- 4 eggs
- 6 egg yolks
- 1 t unflavored gelatin
- 1/2 c butter, frozen
Instructions
- Add the sugar to a heavy nonreactive saucepan. Zest the lemons directly into the pot and set the lemons aside. Squish around the sugar and lemon zest until the sugar starts to feel a little moist from the oils.
- Add your lemon juice, salt, and gelatin to the sugar mixture and bring the heat to medium high, stirring periodically to dissolve your sugar. Don't let it boil.
- While the sugar is heating and dissolving, separate six eggs to get your egg yolks, saving the egg whites for your cake. Whisk together the egg yolks and the remaining four eggs in a larger bowl than you think you'll need.
- As soon as the sugar is dissolved, remove the pot from the stove. While whisking the eggs, slowly pour the hot liquid into the eggs to temper them. If you don't whisk or if you pour too quickly, you'll end up with scrambled eggs. Once the mixture is fully incorporated, pour back into your saucepan and return it to the stove.
- Cook at medium low heat for 10 or so minutes, stirring constantly with a whisk to keep anything from burning on the bottom. If you have a candy thermometer, keep cooking until it reaches 170 degrees.
- Turn the heat off, and add the frozen butter. Once you add the butter, keep stirring constantly so that the fat is absorbed into your lemon curd.
- Use a fine mesh strainer and carefully pour your lemon curd into the strainer over a heat safe storage container.
- Place plastic wrap atop it so that your lemon curd doesn't develop a skin. Store it in the refrigerator until you're ready to use it. This will easily keep two to three days and still make a beautiful filling for a cake. Simply stir it up and use when you're ready!
Notes
- This recipe makes enough to fill a 4 layer cake or one pie. I made my recipe dairy free by utilizing coconut oil in place of the butter. It worked beautifully and didn't change the flavor. If you have allergies, this is a great substitute.
- You can make this without a candy thermometer, as well. If you don't have a thermometer, you'll know it's done when it starts to get really thick and darkens in color. When you can draw a line in your lemon curd with a spatula and the line remains after you've drawn it, you know it's done.
Recommended Products
As an Amazon Associate and member of other affiliate programs, I earn a commission from qualifying purchases.


Nutrition Information:
Yield: 12 Serving Size: 1/2 cupAmount Per Serving: Calories: 224Total Fat: 12gSaturated Fat: 6gTrans Fat: 0gUnsaturated Fat: 5gCholesterol: 175mgSodium: 143mgCarbohydrates: 28gFiber: 1gSugar: 26gProtein: 4g
This site uses an outside source to provide nutrition. If you need exact details, please calculate yourself.
[…] a curd girl. I love lemon curd, and I shared my favorite pineapple curd, but now that it’s strawberry season, I’m […]
[…] into a clean bowl. Save the yolks for another recipe. My recommndation? Either pineapple curd or lemon curd. Use them a a dip for fruit or filling for cake or – gasp – mix them with your homemade […]
[…] we’re still chatting about my mom’s 70th birthday. I told you already about the amazing lemon curd filling I made for her cake. It seemed like the best solution when she was looking for a lemon cake for her […]