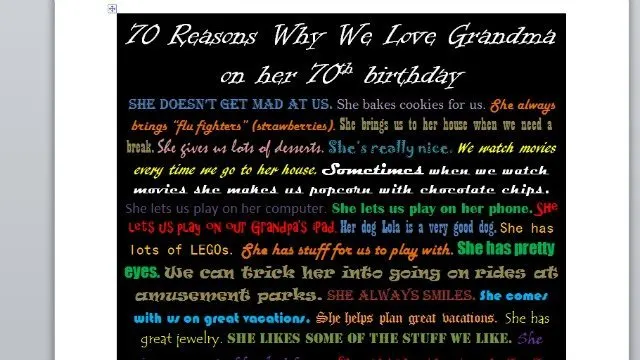
 My mom turned 70 last week, and I was stumped as to what to get her for her birthday. She has everything she wants and not a lot of room for “stuff.” I wanted to do something memorable that would last, which meant just taking her for dinner wasn’t going to cut it for this milestone birthday. Finally, I decided to have the wee ones help me by creating a one of a kind piece of art that looks like it was a custom print but really was something we made at home.
The good news? She absolutely loved it. She cried reading it. And she didn’t believe that we could possibly have made it at home.
All you need is an 8×10 frame, paper, a computer, and a color printer. The HP Envy 5350 I have prints in great quality, and I set this to print in best quality, and it turned out beautifully. We simply let the ink dry for a moment then cut it to fit the frame and voila – but I’m getting ahead of myself.
To start, I had the wee ones write out 70 things they loved about their grandmother. I chose 70 because she turned 70, but I am planning to do something similar for my in-laws for their 50th wedding anniversary in a few months, so we’ll do 50 things there. Whatever the occasion or number, create your list on paper or in Word.
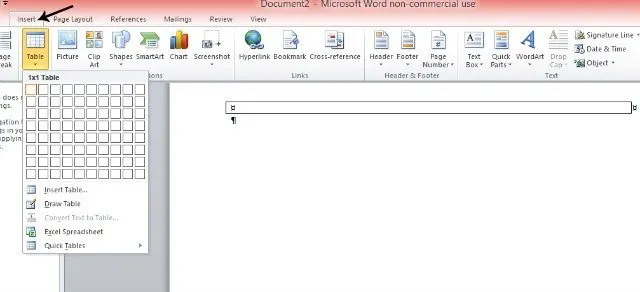
When you’re ready to create your “custom” print, open Word, and insert a 1×1 table. How you do this will vary by your version of Word, but you generally go to the Insert option and choose Table then follow the instructions from there.
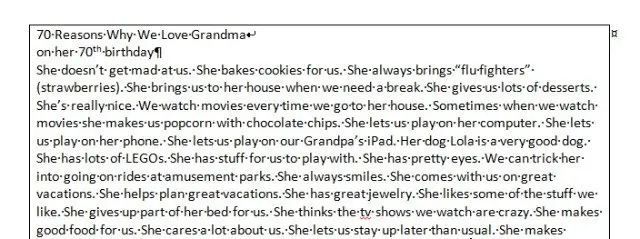
Go ahead and type your list into this 1×1 table, starting with your title. Don’t worry about the fonts and such yet, just get your data entered. We simply used a period and a space between each item to separate them, and that worked out beautifully.
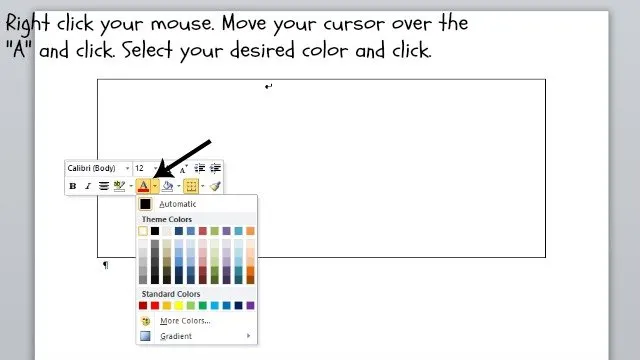
Once your entire list is entered, you will start playing with the fonts. The easiest way to do this is to select all your type and turn it white to start. Press ctrl-A, then select the white font from the button that looks like a stylized A.
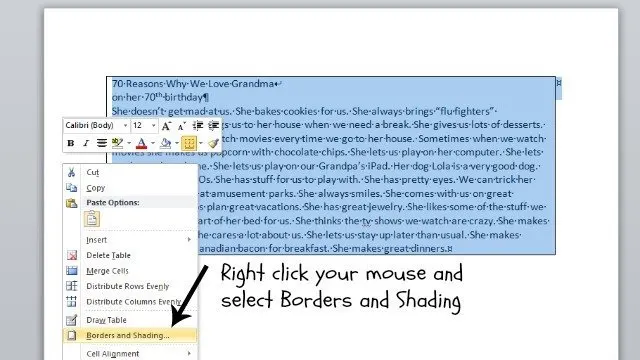
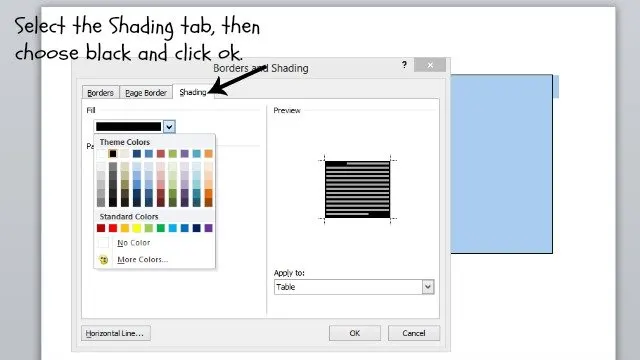
Next, you’re going to highlight the entire table. Move your cursor to the left of your table in line with it until it turns into an arrow pointing to the upper right, then click. This will select your table. Right click your mouse and choose “borders and shading.”
Select the tab to the far right labeled “Shading” and choose black as your fill color. Select ok, and you now have white text against a black background.
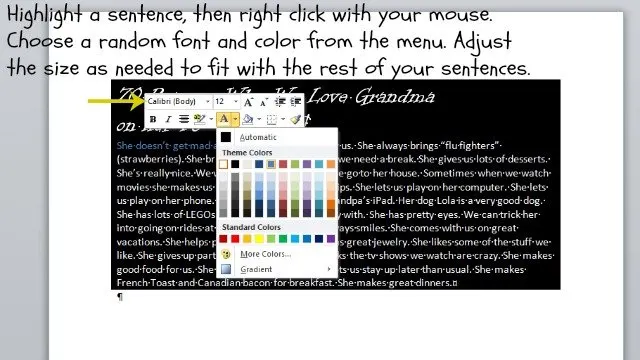
From there, you want to stylize your font. Highlight one sentence at a time with your mouse. Randomly choose a font from the menu options, and randomly choose a color so that you have variety. You don’t have to create a pattern or not use a font or color for a specific number of sentences, as it looks more artsy to be completely random. Some fonts are extra small naturally, and you will want to increase their size. While you still have the sentence highlighted, press ctrl-shift-. which will increase the font by once level. Continue doing so until the font is approximately the same size as the remainder of your text.
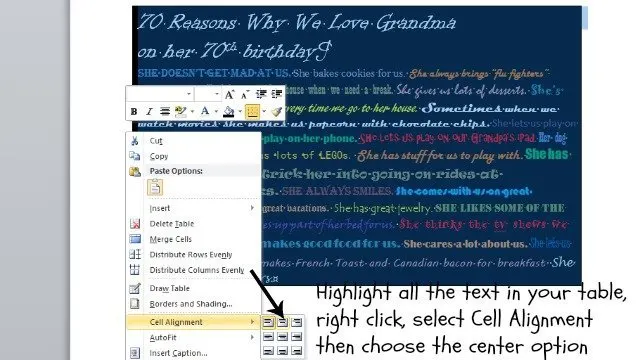
Once all your sentences are changed to be stylized, select your entire text box and center it. You can either press ctrl-A or right click, choose Cell Alignment and select the centered option.
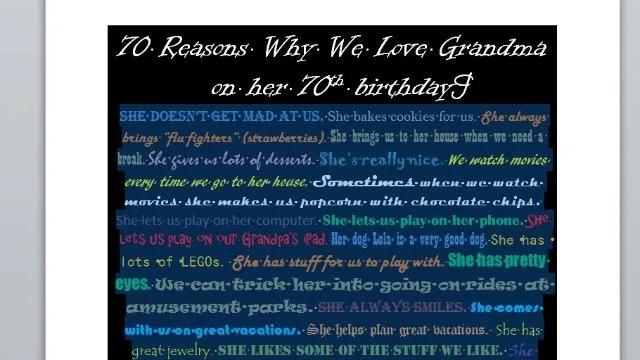
Select your headline and adjust the font so that it is as large as you wish it to be. I made two lines and use shift-enter to make a paragraph that was not double spaced after the return. I then played with the font size so that it was as large as possible without spilling into additional lines by entering larger font sizes number by number (31, then 32, then 33, etc).
Highlight the sentences within your text box and play around with the font in the same way so that your text box takes up as much of a single page as possible without making a second page. This will help fill your frame to its maximum.
Once this is ready, your custom word art is ready to print. Print using the best setting available, then let the ink dry for 2-3 minutes. Use a paper cutter to trim the paper to be 8×10 – cutting one quarter inch each off the left and right sides and one half inch each off the top and bottom. Place into your frame, and it is ready to go!
Or you can contact me, and I would be willing to make these and ship them for a fee. They are time consuming, but they turn out absolutely gorgeous!

This a great gift idea. Gifts should always be thoughtful
I completely agree on the thoughtful aspect. I loved how much it moved my mom. 🙂