I found out about Brazilian cheese bread the way most people do – from sampling at Costco. Of course, they call them Brazilian cheese bites.
Of course, the recipe’s real name is Pao de Queijo – but I’ll stick with Brazilian cheese bread because I hate mispronouncing words, and I know I’m not pronouncing that correctly in my head. Yet. Some links are affiliate links that earn me a commission if you purchase.


But back to Costco. They have a brand of Brazilian cheese bites that they sample regularly.
Every time I take one, I almost pick up a package to purchase. Then I see the $11.99 pricetag and put them down again.
The Brazilian cheese bread reminds me of gougeres, which is a French cheese puff and surprisingly easy to make. I vowed to make them at home instead.
I vowed it often, but it took me months before I finally started researching how to make Brazilian cheese bread, and wow are there a bunch of different varieties. But just like any dish, of course there are variances.
Since I fell in love with the Brazilian cheese bites I ate at Costco, I wanted something similar to those puffs of heaven. I found several recipes and played with them to create what I enjoyed most.


The interesting part of my research? Brazilian cheese just happens to be gluten free.
Traditionally, you make these with cassava flour, but that can be hard to find in the States. Instead, feel free to substitute tapioca flour in its place.
I tested it both ways, and while there is a slight flavor variance, tapioca works just fine. If you want to stay authentic, purchase cassava flour.


How to Make Brazilian Cheese Bread
Regardless of whether you purchase cassava flour or stick with tapioca flour, the method remains the same.
I played around with it a bit and found what works best for me, which isn’t the directions I initially saw. Start by preheating your oven to 450 degrees.
Just like the apple cinnamon muffins I made recently, the oven starts hot to give a great puff, then you turn down the heat once you start baking. This helps to create a nice rounded Brazilian cheese bread bite.
In a heavy saucepan, bring the milk and butter to a slow boil, then turn off the heat. If you plan to use a hand mixer, add the cassava or tapioca flour to your pot and use your hand mixer to slowly begin mixing the flour in.
At first it will look way too thick and crumbly, but it quickly comes together in a semi-solid gel.
If you plan to use a stand mixer – my preferred method – pour the liquids into the bowl of your stand mixer, then add the flour here.
I started mixing it by hand in the pot then moved the mixture to my stand mixer, and it was a disaster. This method creates far less mess. Either way, mix for a few minutes, then let the mixture cool slightly.
While the mixture rests, add your eggs to a bowl and whisk until well beaten. Once you can comfortably touch the dough with your hands, turn the mixer (hand or stand) back on low. Slowly pour a third of the eggs into your bowl.
It will take a few minutes, but eventually, the egg will incorporate into your batter. Repeat with the next third, which will incorporate faster.
Add the last third and mix until all the batter becomes homogeneous. You may need to scrape down the beaters at times, as it is a thick, sticky batter.
Add the cheese in two batches, mixing thoroughly between additions. It will be less sticky but still a thick dough.
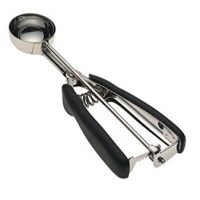
Use a medium size cookie scooper to portion the batter. Place each round onto a silpat lined cookie sheet with twelve Brazilian cheese bread balls on each sheet.
Altogether, you should end up with 24 Brazilian cheese bread balls.
Place into your 450 degree oven on two racks. After two minutes, turn the heat down to 350 degrees and bake for another 20-22 minutes.
The Brazilian cheese bread should puff and just start to turn a golden yellow but not brown. The outside should feel dry when you remove it from the oven.
Let it cool just a minute or two, then break into your Brazilian cheese bread for a little dose of heaven in your kitchen.


Store in a tightly sealed container for up to a week. Reheat for 15-20 seconds in the microwave for one or two or heat in the oven at 200 degrees for 5-7 minutes for a larger batch.
Have you ever tried Brazilian cheese bread?
I served mine with some of my tomato basil bisque for my kids. The combination of Brazilian cheese bread with this Italian soup worked surprisingly well.
These are great on their own or enjoy with some chimichurri steak for a pan-South American dinner.


Brazilian Cheese Bread
These delicious bites of heaven are surprisingly gluten free. Make them at home at a fraction of the cost of store bought Pao de Queijo. This recipe comes together beautifully and makes enough to serve friends or store for later.
Ingredients
- 1 c milk
- 3 T butter
- 3/4 t salt
- 2 c tapioca flour or cassava flour
- 2 eggs
- 1 c Parmesan cheese
Instructions
- Preheat oven to 450 degrees.
- In a heavy saucepan, bring the milk and butter to a slow boil, then turn off the heat. Pour the liquids into the bowl of a stand mixer, then add the flour. Mix on low until the dough comes together, then let the mixture cool slightly.
- While the mixture rests, add eggs to a bowl and whisk until well beaten. Once you can comfortably touch the dough, turn the mixer back on low. Slowly pour a third of the eggs into the bowl. It will take a few minutes, but eventually, the egg will incorporate into the batter. Repeat with the next third, which will incorporate faster. Add the last third and mix until all the batter becomes homogeneous. You may need to scrape down the beaters at times, as it is a thick, sticky batter.
- Add the cheese in two batches, mixing thoroughly between additions.
- Use a medium size cookie scoop to place rounds onto a silpat lined cookie sheet with twelve on each sheet.
- Place into 450 degree oven on two racks. After two minutes, turn the heat down to 350 degrees and bake for another 20-22 minutes. The Brazilian cheese bread should puff and just start to turn a golden yellow but not brown. Let it cool just a minute or two, then serve. These will store in a tightly sealed container on the counter for up to a week. Reheat 15-20 seconds in the microwave.
Recommended Products
As an Amazon Associate and member of other affiliate programs, I earn a commission from qualifying purchases.


Nutrition Information:
Yield: 24 Serving Size: 1 pieceAmount Per Serving: Calories: 94Total Fat: 3gSaturated Fat: 2gTrans Fat: 0gUnsaturated Fat: 1gCholesterol: 23mgSodium: 165mgCarbohydrates: 14gFiber: 0gSugar: 1gProtein: 2g


I am a participant in the Amazon Services LLC Associates Program, an affiliate advertising program designed to provide a means for sites to earn advertising fees by advertising and linking to Amazon.com.
So. I just realized these are the Chipa Bread bites I had at an Argentinian Empanadas place here in Durham.
And they were amazing.
So naturally I need to consider making them. Because, yum.
You totally do. I’m planning to make some more this weekend. Yum!