Last week, we made treasure box cookies. Why? The wee ones love to cook and bake with me, and as they’re getting older, they like to get more involved in the process. I encourage them to decide what they want to make, and now they’re starting to do more and more of the work themselves.
The other night, Mister Man made spaghetti and meatballs with homemade sauce and homemade Italian meatballs all by himself. I was a little nervous with him mincing the garlic, but he did just fine. So when they said they wanted to make cookies, who was I to argue? At first, they just wanted to make plain old chocolate chip cookies, but I suggested we get creative and make them special.
We talked about various ways we could do this, and eventually we settled on turning our cookies into stuffed mini-muffins. They thought it was hilarious that their cookies would look plain and boring but yet have a cool surprise treasure inside. And treasure box cookies were born.
 The wee ones did all the work on this one, from measuring ingredients to cracking eggs. And if an 8 and 10 year old can make these, so can you! They were delicious and fun and surprisingly chewy. These are definitely keepers, especially since Mister Man has already asked that I make these instead of cupcakes for his half birthday this year.
Treasure Box Cookies
Ingredients:
3/4 c butter, melted (12 T – and yes, this works with coconut oil)
1 c brown sugar, packed
1/2 c sugar
1 T vanilla bean paste
1 egg
1 egg yolk
1/2 t baking soda
1/2 t salt
2 c flour
2 c chocolate chips
Directions:
Preheat your oven to 325 degrees.
Melt your butter. In a bowl, cream together the melted butter with you two sugars. When light and fluffy, beat in the first egg then the second yolk and vanilla bean paste. Beat until creamy.
Add the baking soda and salt and mix until thoroughly combined. Add the flour and stir until just combined.
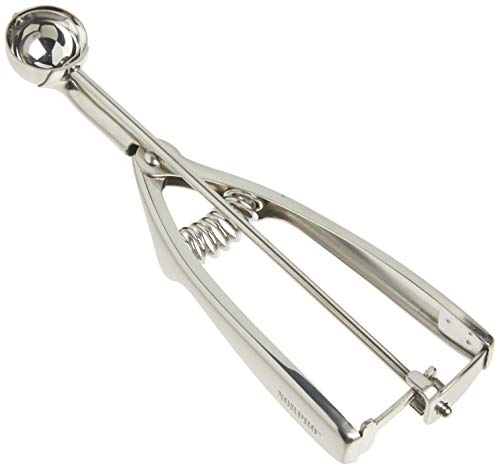
Using a small cookie scoop (the size you usually would use for truffles), scoop out your dough and place a ball into each hole of a mini muffin tin. This recipe makes 30 cookies, so plan accordingly.
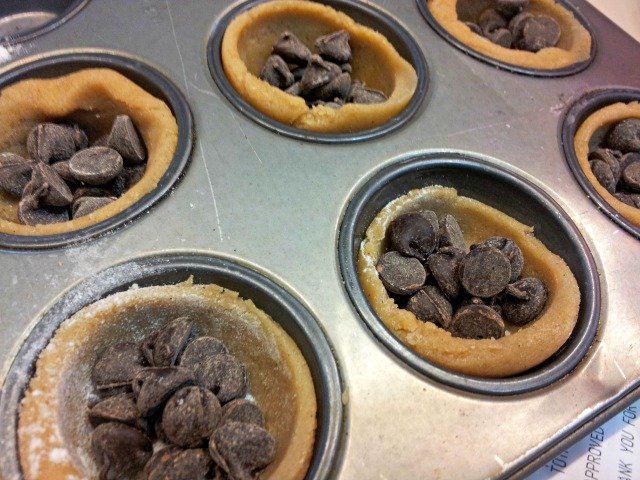
Set a little flour in a dish, and use a wooden tart tamper to push the balls of dough into the round molds you need to form the base of the treasure box. You want the dough to just come up to the edge of the mini muffin pan, no higher. Between each tamping, dip the tool into the flour and shake off excess. This will keep the dough from sticking to your tool.

Fill your cookies with chocolate chips. Don’t be afraid to put too many in, as the chocolate will melt and the cookies can hold plenty of chips.
Get a small amount, just over a teaspoon or so, of the dough and flatten it in your hand. This is what makes the lid for your treasure box.

Place the lid over the rest of the cookie and press down gently to lightly seal. Because the dough will melt as it cooks, it’s ok if it isn’t a perfect seal. You just don’t want to see the chips from inside the dough.

Place the cookies into your 325 degree oven and bake for 15-18 minutes, until the tops are cracked and lightly golden. Let them cool in the pan for at least 10 minutes before removing them or they will fall apart as you take them out. Cool the rest of the way on a cooling rack. These are best the same day but will keep for 3-4 days in a sealed container on your counter.


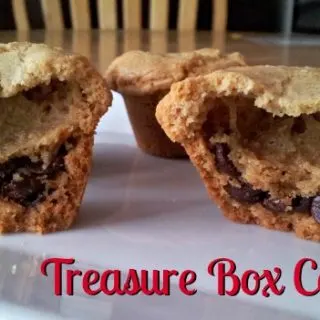
Treasure Box Cookies
These cookie are baked in a mini muffin pan and the chocolate chips inside are like little bits of treasure. These are fun for a party as an alternative to the traditional chocolate chip cookie
Ingredients
- 3/4 c butter, melted
- 1 c brown sugar, packed
- 1/2 c sugar
- 1 T vanilla
- 1 egg
- 1 egg yolk
- 1/2 t baking soda
- 1/2 t salt
- 2 c flour
- 2 c chocolate chips
Instructions
- Preheat oven to 325 degrees.
- Melt butter. In a bowl, cream melted butter with both sugars. When light and fluffy, beat in the first egg then the second yolk and vanilla. Beat until creamy.
- Add baking soda and salt and mix until thoroughly combined. Add flour and stir until just combined.
- Using a small cookie scoop, scoop dough into each hole of a mini muffin tin.
- Set a little flour in a dish, and use a wooden tart tamper to push the balls of dough into the round molds you need to form the base of the treasure box. You want the dough to just come up to the edge of the mini muffin pan, no higher. Between each tamping, dip the tool into the flour and shake off excess. This will keep the dough from sticking to your tool.
- Fill cookies with chocolate chips. Don't be afraid to put too many in, as the chocolate will melt and the cookies can hold plenty of chips.
- Get a small amount, just over a teaspoon or so, of the dough and flatten it in your hand for the lid of your treasure box. Place over the rest of the cookie and press down gently to lightly seal.
- Place cookies into 325 degree oven and bake 15-18 minutes, until the tops are cracked and lightly golden.
- Let cool in the pan for at least 10 minutes before removing them. Cool the rest of the way on a cooling rack.
Notes
These are best the same day but will keep for 3-4 days in a sealed container on your counter.
Recommended Products
As an Amazon Associate and member of other affiliate programs, I earn a commission from qualifying purchases.


Nutrition Information:
Yield: 30 Serving Size: 1 cookieAmount Per Serving: Calories: 168Total Fat: 8gSaturated Fat: 5gTrans Fat: 0gUnsaturated Fat: 3gCholesterol: 25mgSodium: 102mgCarbohydrates: 23gFiber: 1gSugar: 15gProtein: 2g
This site uses an outside source to provide nutrition. If you need exact details, please calculate yourself.
[…] […]
OMG those look so good! I can’t wait for the next day off from work so I can make those!