This DIY cat treat dispenser tutorial and campaign has been compensated by Collective Bias, Inc. and its advertiser. All opinions are mine alone. #IAMSCat #CollectiveBias
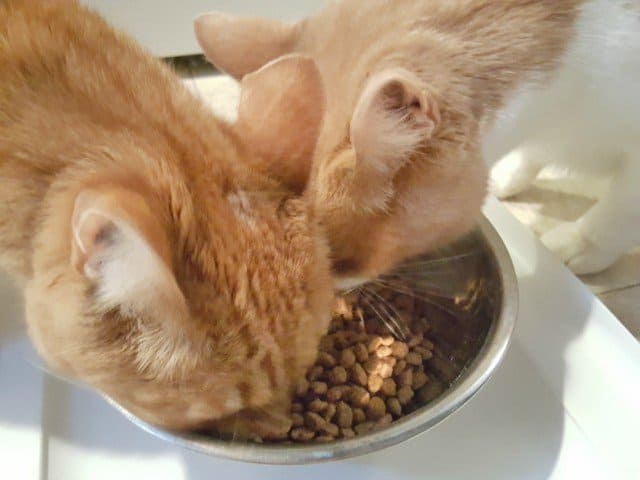
Meow and Roar are part of our family. They’ve been with us for over nine years now and were maybe nine months when we adopted them, and we want them to be with us for a long time to come. That means we do our best to keep them in good health in the same way we do for ourselves – we feed them well, make sure they have plenty to drink, and ensure they get plenty of exercise. And yes, we give them special treats, too.
Just like people, cats need mental stimulation to keep them sharp. That’s part of why we give them treats in a special dispenser rather than just handing the treats to Meow and Roar. We want them to have to work for it and solve a puzzle to earn the treat, which makes it into a fun game for them and also has the added benefit of making the treats last longer.
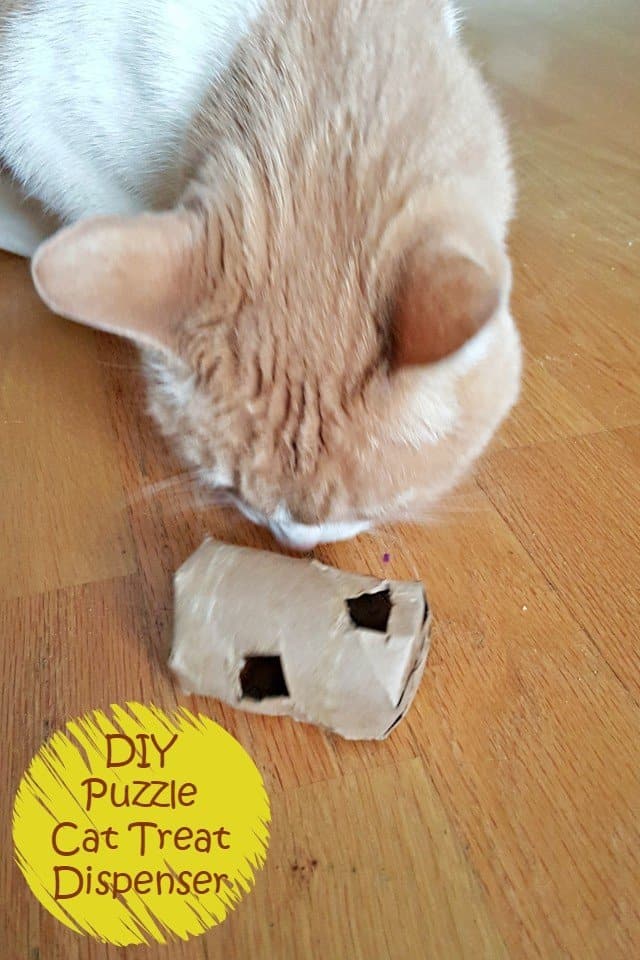
While there are puzzle treat dispensers you can buy, I like using a DIY cat treat dispenser. Not only is it cheaper (the cost of a couple dots of non-toxic glue) and upcycles something we too often throw away, but I can customize it for my own cats and change it up to keep them interested. I like to make my DIY cat treat dispenser from a (clean) toilet paper or paper towel roll. There are no dyes, and I don’t decorate it at all because I know my cats will chew on it, lick it, and more – and I don’t want their special treat to be something that does them harm in any way.
The first time I made a DIY cat treat dispenser, they couldn’t quite figure it out. They knew there was something in there, but they couldn’t figure out what to do. I quickly learned to make more holes for the treats to fall through so that it was easier for them to grasp the concept. As they’ve gotten better at using the DIY cat treat dispenser, I’ve created new ones that have fewer holes so that it requires a little more work and effort – and Meow and Roar quite happily enjoy it.
The big key is to ensure that the holes you make in the DIY cat treat dispenser are big enough for the treat to fall through semi easily. If you hold it up and shake it, you should be able to dislodge a treat. If you can’t, make your holes a little bigger. There’s nothing worse for your cat than knowing there is a delicious treat just out of reach. Teasing a cat like that is just not cool.
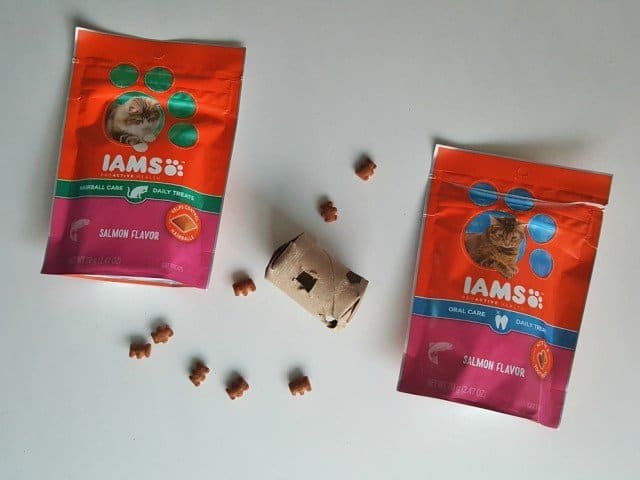
I am a huge fan of treats that do double duty, too. Not only are they delicious for Meow and Roar, but the IAMS™ Hairball Care and Oral Care helps target those dietary needs. The Oral Care treats help clean teeth and reduce tartar and plaque buildup, while the Hairball Care treats have patented hairball-control formula that helps reduce hairballs – and that makes everyone in my house happy.
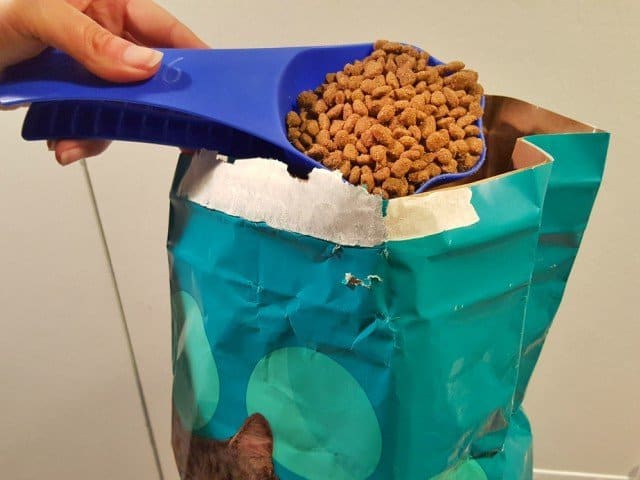
I saw the chicken and salmon flavors of the new IAMS™ Hairball Care, Digestive Health, and Oral Care when I was at Walmart picking up their favorite IAMS™ Proactive Healthy Weight & Hairball Cat Dry Cat Food. They’re crunchy and the cats love them, and I love the resealable bag, which keeps them safe when it isn’t treat time!

I don’t joke when I saw that Meow and Roar’s favorite food is the IAMS™ Proactive Healthy Weight & Hairball Cat Dry Cat Food. I made the mistake of setting the bag down in my foyer while I brought in the rest of the groceries. Why was this a mistake?
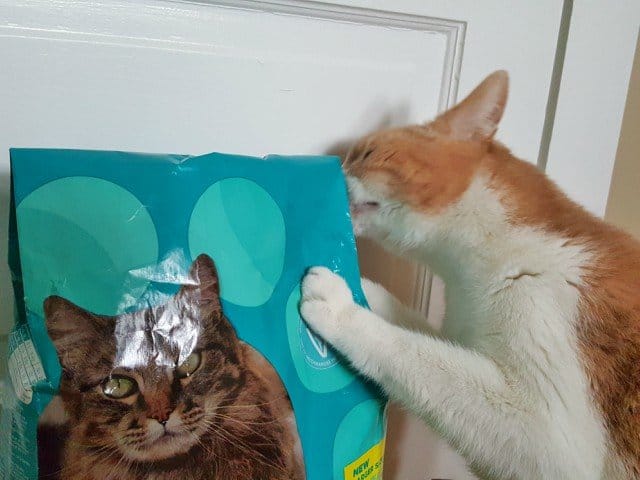
I can’t stage stuff like this!
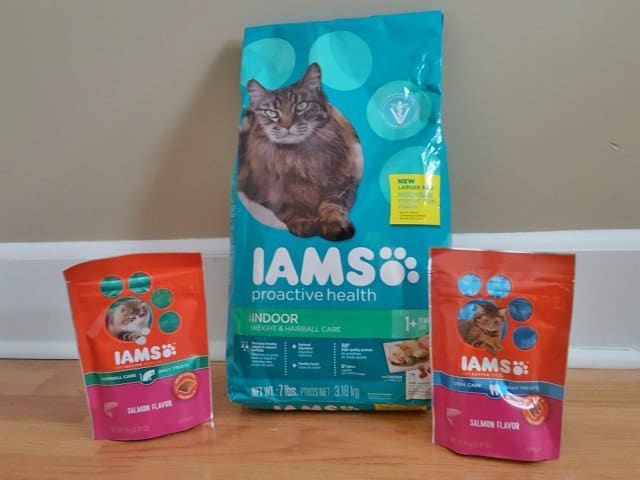
Fortunately, I was able to get back inside, witness the hilarity, and rescue the bag before Meow completely ripped it open and had the kibble all over my floor. No, that’s never happened before, why? IAMS™ has a new formula that allows cat lovers to customize their cat’s nutrition through a well balanced lifestyle with IAMS™ dry, wet and treats. We’re in the healthy weight and hairball stage, but there are plenty of other choices, too!

I didn’t pick up the Digestive Health treats this time, but I’m definitely going to snag a bag next time I run out and need to refill my DIY cat treat dispenser. See? Choices!
How to Make a DIY Cat Treat Dispenser
This cat treat dispenser is ready in under ten minutes – mostly to let the nontoxic glue dry – and will last a good while. As it smells like the cat treats, I suggest picking it up and putting it away after your cats have emptied it so that you can easily find it. Otherwise, you’ll end up (*cough* like me *cough*) searching under couches, the entertainment center, and more.
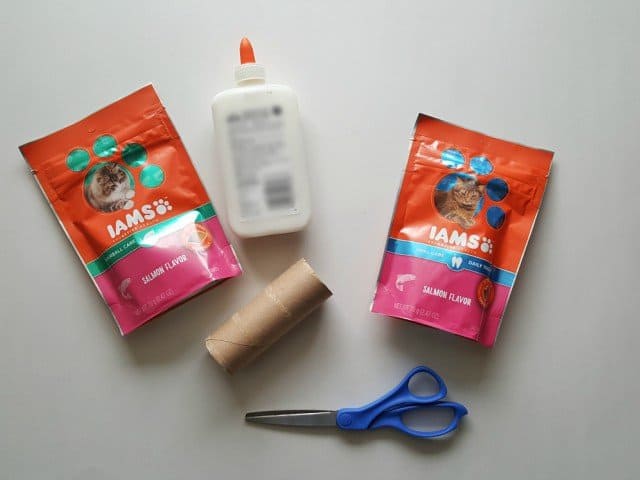
All you need to make it is a clean toilet paper or paper towel roll, a pair of scissors, nontoxic glue, and your IAMS™ cat treats.
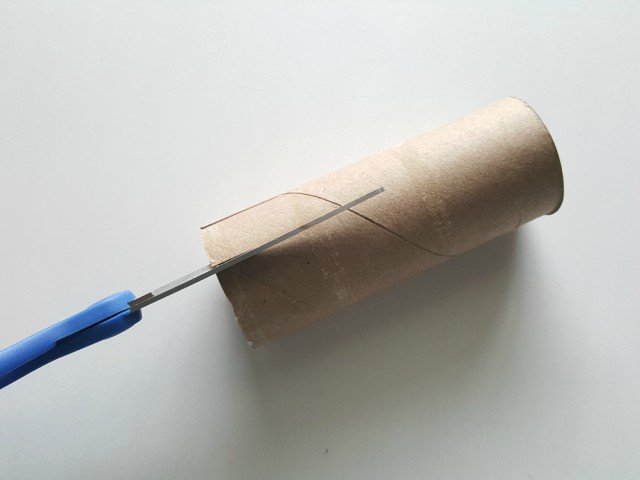
Start by snipping one inch long cuts along one edge of the cardboard tube, spacing them a half inch apart. You don’t need to measure this exactly, just guesstimating is fine.
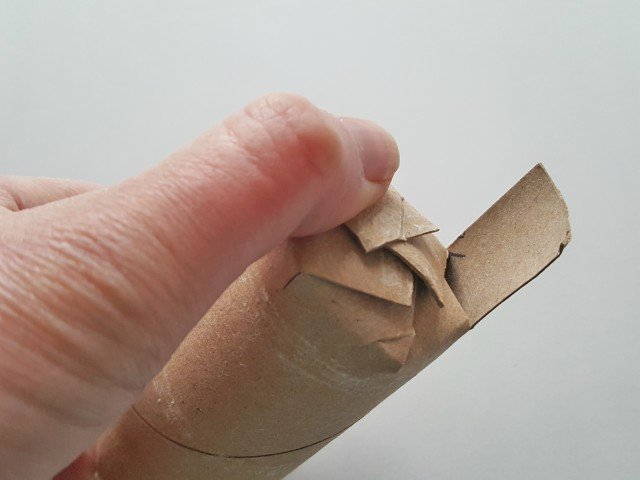
Fold down each of the slats you just created toward the inside of the tube to give it shape, then release them. Fold just one slat down, then add a dot of glue to the center of it, pressing the next slat onto the glue. Repeat the procedure all around the tube until all the slats are folded over. The last slat should not have glue on it, obviously! This should create a seal on one end of your cardboard tube. Press the slats together from the inside and outside, using both hands, until the glue dries enough to hold it in place.
Next, use the pointed end of your scissors to punch holes into the side of the cardboard tube. Space them out so that you can enlarge them enough to let the IAMS™ treats fall through. If your cats are new to a DIY cat treat dispenser, make 5-6 holes in the tube to give the treats more chances to fall through. If you cats are experts, make fewer holes. Be sure to leave at least an inch room on the open end of the cardboard tube, as you’ll be sealing that off shortly.
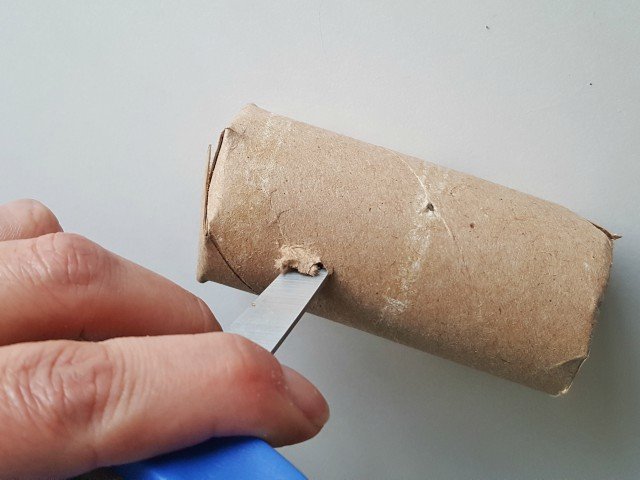
Once you’ve punched as many guide holes as you’ll need in the cardboard tube, use the scissors to enlarge them, cutting the holes to be slightly bigger than the treats. You may need to use a treat to measure how big to make the holes.
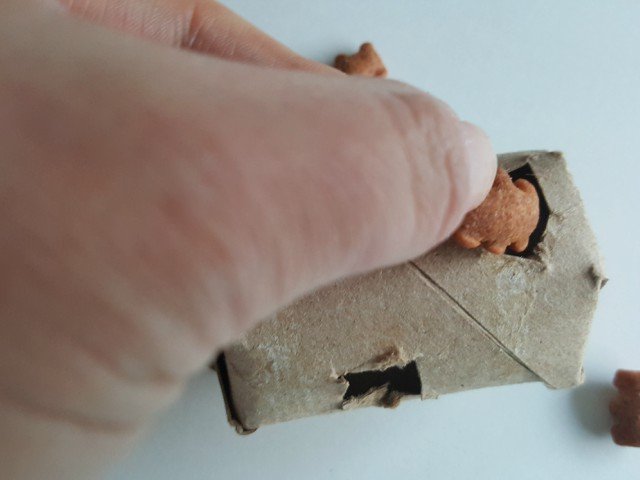
Next, cut one inch slats along the open edge of the cardboard tube, being sure not to cut into any of the holes you’ve made. Fold them down and glue them the same way you did the other end. You can stick your fingers in the hole(s) you’ve made to help hold the slats together from the inside and outside while the glue dries – see there was a method to the madness of cutting the holes before sealing the second side!
Once the glue dries, all you need to do is place treats inside your new DIY cat treat dispenser and let your cats have at it!
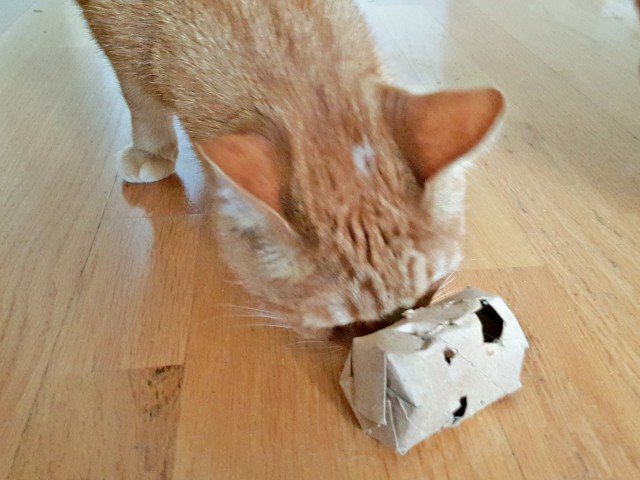
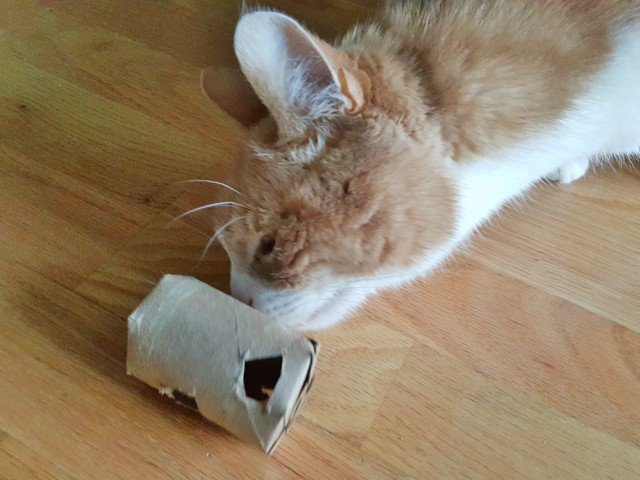
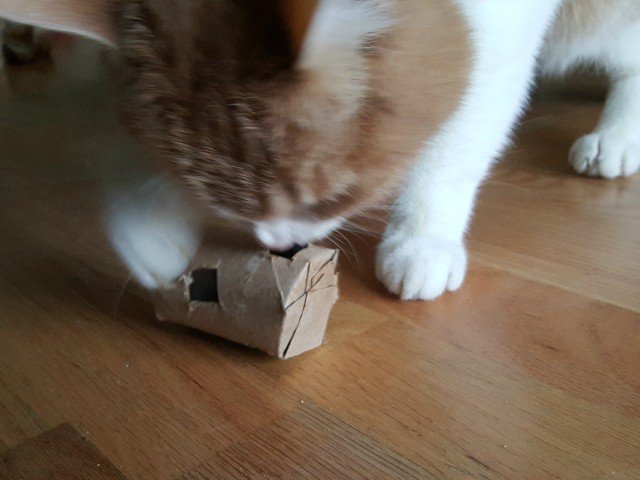
Watching their various tactics to get at the treats inside is hilarious. My favorite was when Meow picked it up like a mouse and just shook it. The treats flew out, and I think he was more surprised than I was! Typically, they roll it along the floor with their noses or paws until they treats escape. When they’re particularly energetic, they like to bat it across the floor and chase after the treats that come skittering out.
The multi-purpose DIY cat treat dispenser – exercise, teeth-cleaning, puzzle brain-building, special treat giving toy of awesomeness – had me thinking about some of the other tricks I use to keep my cats healthy and active as they get older.
Five Feeding Tips to Keep Cats Healthy and Happy
Use a ceramic or metal dish for food and water. This was a trick I picked up years ago when I volunteered at an animal shelter. We discovered that using plastic dish caused reactions in many of the cats. They ended up with “kitty acne” under their chins because of the plastic. When we switched to ceramic and metal, we didn’t have that problem.
Use a small water dish. We have a big water dish for when we’re gone a day or two and leave the cats to fend for themselves for longer than just a day. Having a small water dish means they drink the water in it more often, and that helps my daughter – who’s in charge of food and water – remember to wash out and change their water every day. When we had our larger dish for every day water, she would often think she didn’t need to change it or she’d think she had. Cats should have fresh water every day.
Try free feeding your cats. We don’t put dry food out for our cats once or twice a day and expect them to eat just that amount. Especially as our cats were strays, we want them to know that there will always be a steady supply of food. Unlike dogs, cats won’t eat if they aren’t hungry, so you can put out food and let them pick at it throughout the day when they’re hungry. This has the added benefit of not only them not feeling like they need to scarf down the food and hoard it (which in some cats can lead to them eating too quickly and it coming back up again), but they also aren’t waiting for us to feed them at 8am every day and meowing at us until we do. Instead, they know that they can eat anytime they want and will have food if and when they’re hungry. This may not work for all cats, but it’s a good solution for many.
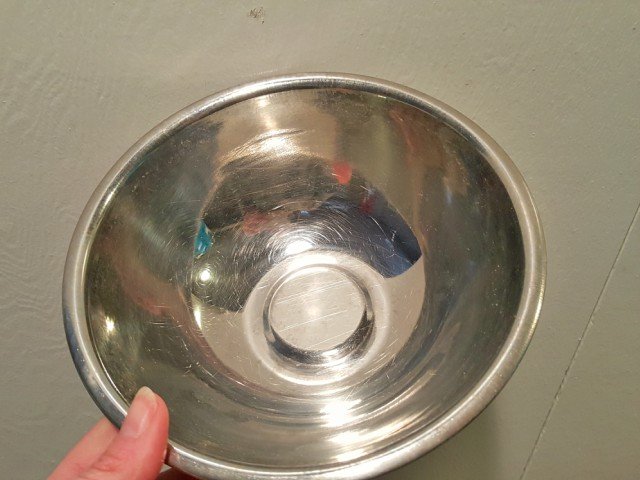
Wash their dishes. Just like people, cats don’t want to eat from dirty dishes. Even though we feed our cats exclusively dry food and we free feed them, their dishes can and do still get dirty.
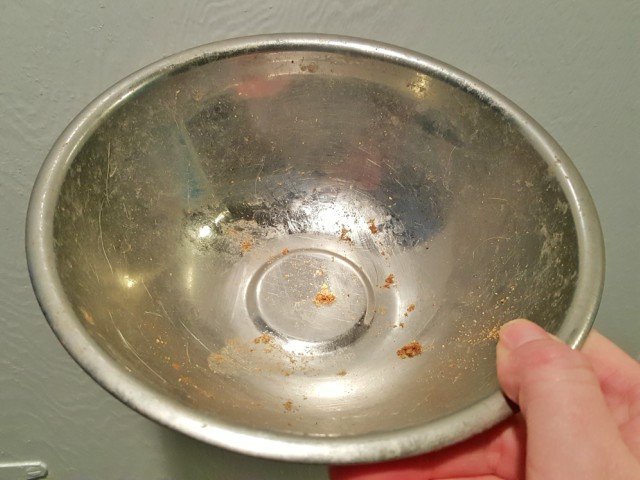
I put a reminder on my calendar to put the cat dish through the dishwasher once a week to ensure nothing icky gets in there.
Get a food mat. If your cats are anything like ours, they aren’t neat and dainty eaters. I sweep the floor of all cat food multiple times a week. In fact, this was our floor after just one day of the cats eating.
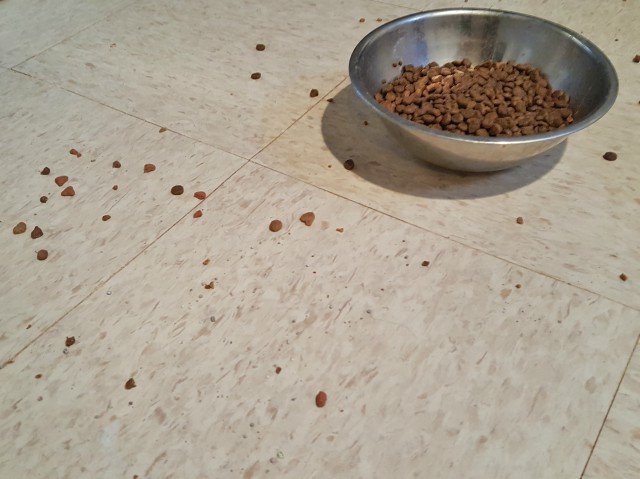
Meow especially likes to pick up a bite of food and then move to the side to eat it, which means he tends to drop pieces on the ground – and he won’t eat food on the ground, only from his bowl. I finally got smart and put a tray under their food and water dishes to contain the mess. While you can buy specially made pet food mats, if you are anything like me, you have a storage bin where the bottom walked away but the top is still hanging out. I simply turned it upside down and placed the cat food and water dishes on it.
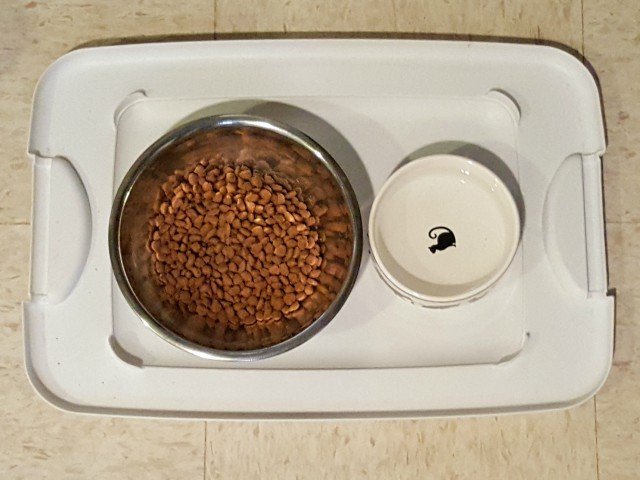
Now all I have to do is remove the dishes and pick up the former storage bin lid and slide any detritus into the garbage instead of sweeping multiple times a week. It cost me nothing and makes cleanup a breeze.
Couple that with the DIY Cat Treat Dispenser, and you can keep their tummies plenty happy!
What a great idea! I need to make one of those for my cat!
This is SUCH a great idea to make snack time interactive! #client
This is such a cool idea, but my cat would have one of these destroyed in a heartbeat!
You’d be surprised. My cats lasted a long time with this – and thankfully the raw materials are readily available to make a new one when I need to. They last several weeks though with play!